If you've been reading this blog for a while,
you may remember this post
or this post
where I first revealed the first chicken bags I made.
Now, if you're wondering what in the heck is a chicken bag??..
This is a bag recycled from chicken feed bags.

(some other feed bags will work as well, ie..some dog food or bird seed bags)
After making several
and experimenting with techniques for creating the perfect pleated bottom,
I finally got the bags perfected.
Well, perhaps not perfect, but doable.
This is a quick tutorial. Measurements are not carved in stone.
Just about anything goes! But this will get you started..
So let's get sewing.....
Begin with a feed bag.

Cut off the bottom of the bag that was factory sewn.
Figure out how big you want your finished bag to be and plan accordingly,
allowing for the top seam (about 2")
and the bottom seam (about 1/2" - 3/4 ".
Crop off a strip (the excess) across top. This strip will become your handles. So you'll need about 3 1/2 or 4 inches. Be sure to cut this line very straight. It will make a nice clean finished product.
Also, take into consideration the picture on the front.
Finished bags should be approximately
16-18 inches
(plus the allowance for the top and bottom seam).
(If you think this seems too tall, don't fret. Some of this becomes part of the pleated base.)
Turn the bag inside out.
Do not cut the sides!!
Mark the bottom of your bag with a sharpie where you want to sew in the bottom seam.
(keeping in mind the picture on the front)
Measure about 4 1/4 inches from the side and then turn toward the middle and pin.
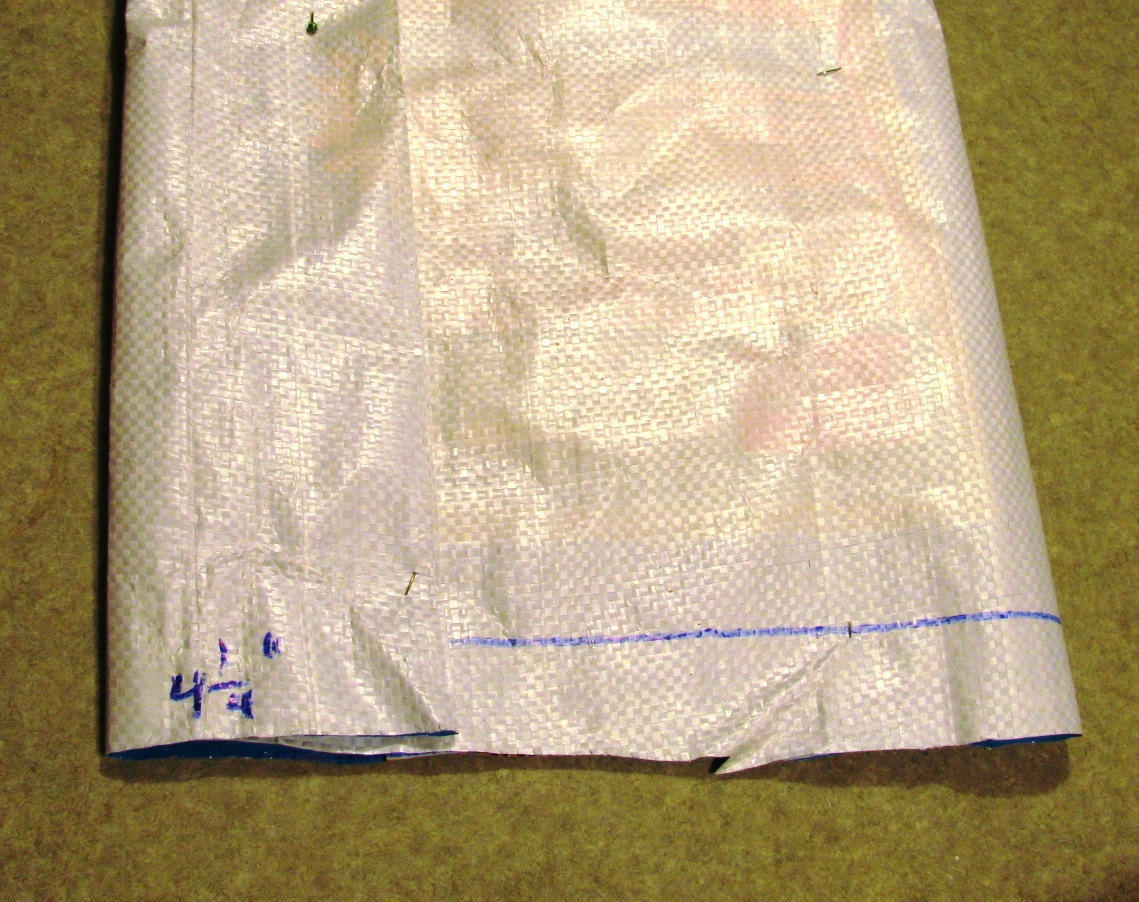
Do the same for the other side as well.
SEW the seam across the bottom.
Turn your bag so the right side is out.
This is the tricky part.
When you flip your bag to the right side, manipulate the bottom seam so that you have triangles on the inside bottom of your bag. Like this...
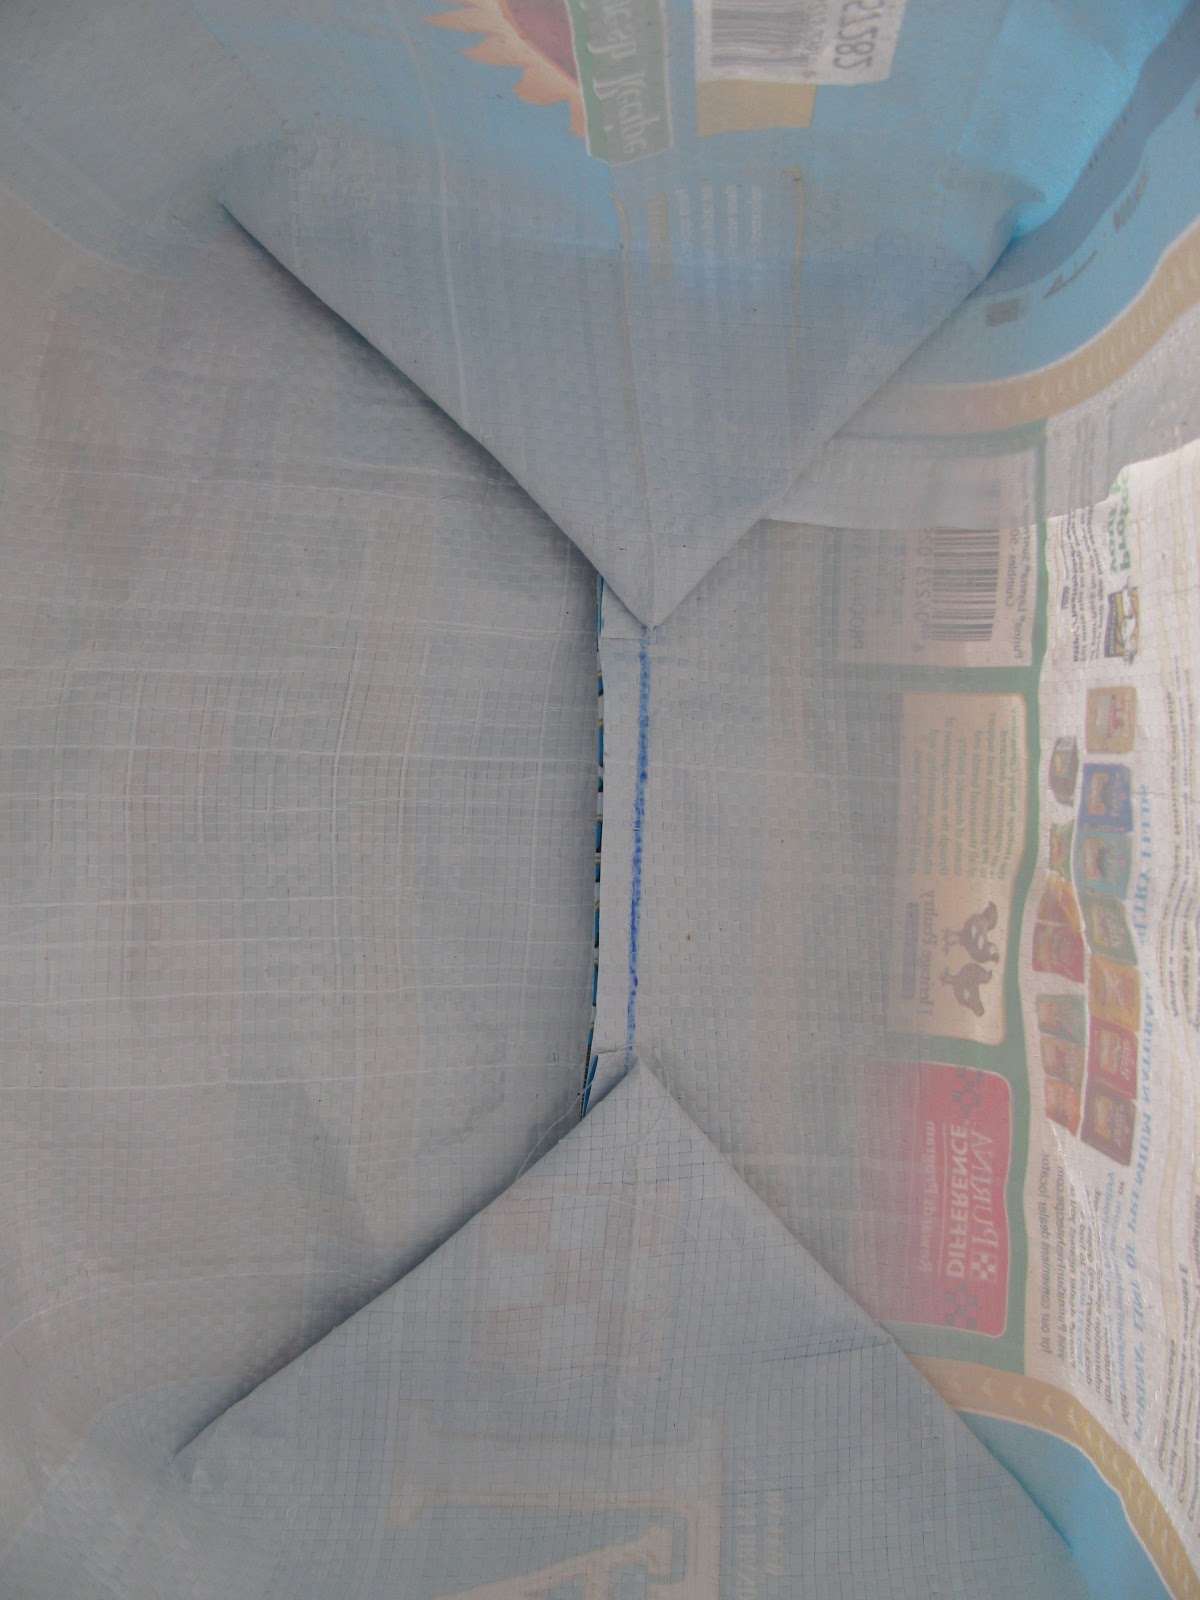
This is what gives your bag that base like a reusable grocery bag.
Turn down the top of your bag about 2 or 3 inches. Pin it. And Sew.
(straight stitch or zig zag)
Take the strip you cut from the top of your bag (cut down to 3 1/2 -4") and cut it so you have a long strip.
Tri-fold the strip, pinning as you go.
Sew the strip.

Cut the long strip (you have just stitched) in half.
This makes 2 short handles.
Pin handles on your bag and sew.
(One strip is sewed to the front, the other to the back.
In other words, don't put your straps across the top of the bag!)

I used lots of zigzagging stitches to ensure the handles would hold.

And there you have it!!
Your very own chicken bag that is sure to get some attention at the grocery store check out!
I also made a smaller, scaled down bag from a sunflower seed bag.

On this bag, I did cut the side seams to make it smaller. This is my Michaels bag!
When the bag is full, it's time to get outta the store!!
Happy Sewing!
I'd love to see your creations.
Email me!!
Got Questions???
Leave a comment!!

No comments:
Post a Comment